
Picasa is my favorite photo organizer. It’s lightweight, fast and simple to use.
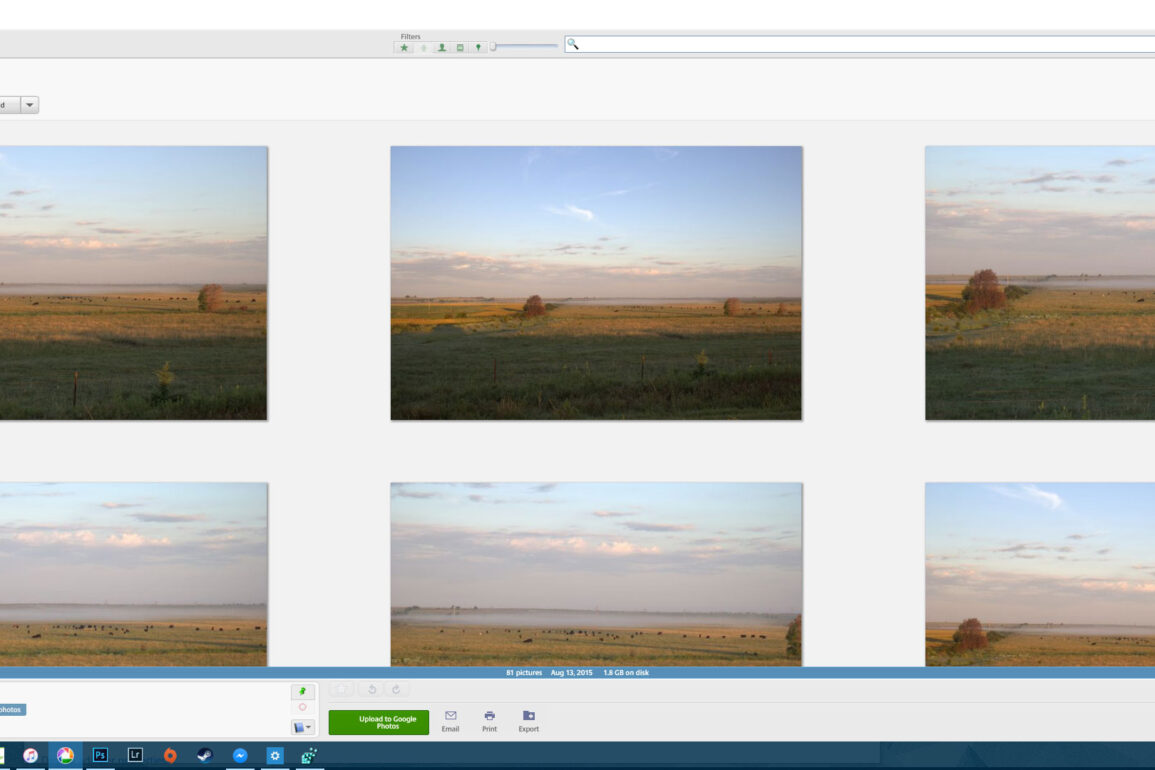
My only main bug with Picasa is how small the thumbnails are, especially on modern resolutions. This is probably due to Picasa being a pretty old program. Google has added features to it such as annoying Google+ integration, but no meaningful core updates.
My current monitor resolution is 2560×1080 pixels, which isn’t even close to being up with the most modern 4k resolutions, due to this thumbnails in picasa go from super tiny small to super small.
I have an ultra wide monitor, so I want the ability to view larger versions of my photos in the preview thumbnails.

I discovered a trick to making the thumbnails larger, which is a simple registry tweak, and with this trick, I can pretty much make the thumbnails as large as I want.
** Edit the registry at your own risk. You can really mess up your computer if you alter the wrong settings.
Make sure Picasa is properly closed and not running.
Simply push Win Key+ R to open Run and type ‘RegEdit’, or if you’re on windows 7 and up simply type regedit in the start menu.
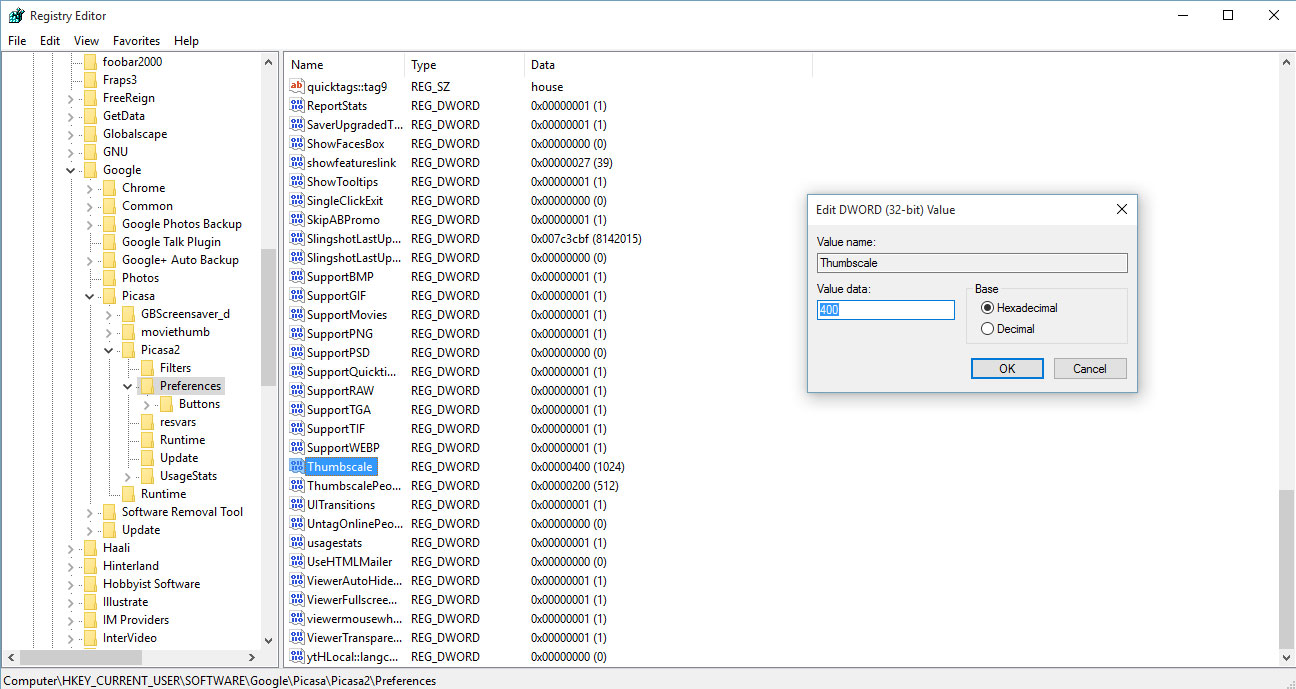
Once you open regedit navigate to HKEY_CURRENT_USER\Software\Google\Picasa\Picasa2\Preferences and look for ‘Thumbscale”, next ot that you’re see a bunch of weird numbers such as “00×0000400”, the 400 represents the current max size of the thumbnails in Picasa. You can right click on Thumbscale and select ‘Modify’, here you can change the resolution. I believe 400 is 400 pixels, so what I did was change the option, load up Picasa and repeat the process til I found the best resolution. I ended up going with 800, which provides me with decent large sized thumbnails in Picasa.
I suggest creating a .reg file in order to easily apply this thumbnail size in the future, because if you touch the thumbnail slider size within Picasa, it’ll reset the thumbnails and you’ll have to redo this entire process over again.
To do this, just open Notepad from the start menu, and copy the following and paste it into notepad. Save it as ‘picasa800.reg’, or whatever name you want, just make sure the extension is .reg. Now all you have to do is double click that reg file and apply it to restore the large thumbnails in Picasa. Remember Picasa must be closed for this change to take effect.
Windows Registry Editor Version 5.00

[HKEY_CURRENT_USER\Software\Google\Picasa\Picasa2\Preferences]
"Thumbscale"=dword:00000800

If you don’t want to go though this messy option, you can download my reg file I use, which is set for 800pixel resolutions. You can also open the reg file in notepad and change the number to whichever resolution you want. (to do this simply right click on the reg file and goto OPEN WITH, and select notepad, do not select always open with). Download Reg File (right click, SAVE as).
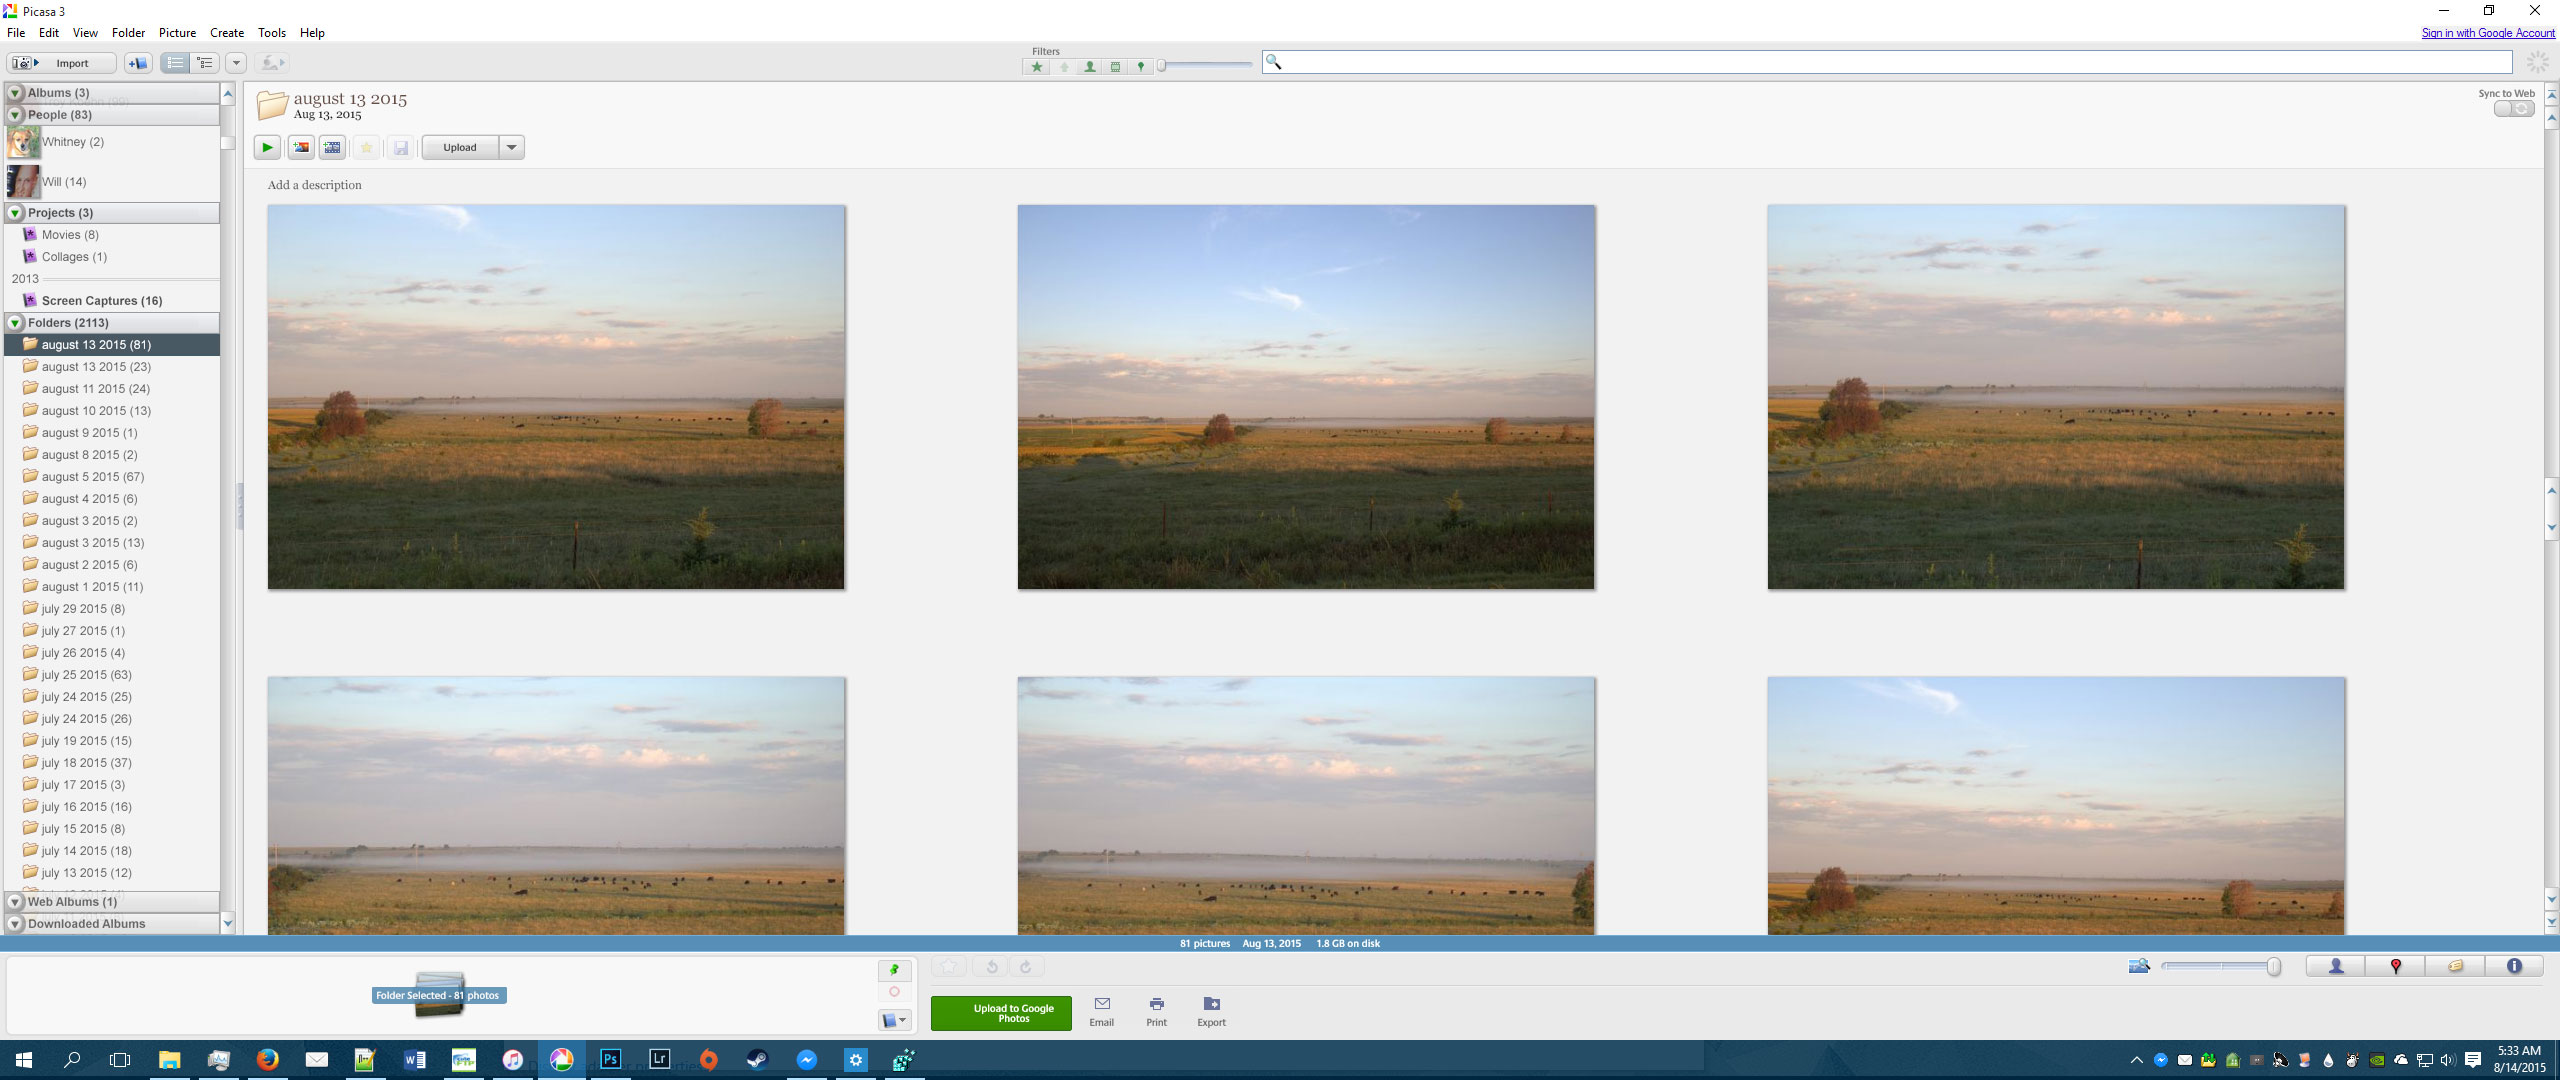
Now enjoy large thumbnails!
If you don’t already have Picasa, I suggest you get it for free from Google!

